Detechdefi

Originally Posted: March 2024
This project aims to create a spreadsheet of an Algorand users activity automatically. I have written these for personal use and have shared it incase others find the work helpful. This is a refresh/continuation of my previous project, AlgoCSV. Colouring in screenshots are not part of Detechdefi and are for display purposes only.
Scope:
AlgoCSV was originally intended to work by requesting data from AlgoExplorer via API requests and to see how far that could go. This was before any wallets or block explorers could display inner transactions to users well/at all. Over the years things have changed withing the Algorand ecosystem such as AlgoExplorer no longer existing and AlgoKit launching. Transaction grouping has also come along way. My original approach involved determining what a group is, which is greatly complicated by application composability. Application composability is a great thing. Even more so when it demonstrates cross platform utility. The approach I have been using for AlgoCSV/Detechdefi doesn't really keep up.

Features:
Identifies multiple assets, applications, and addresses based on data from public APIs, and some from a personal collection (closed platforms pre-2024). Automates marking some transaction types. For example airdrops, trades, deposits. Can surface details such as inner transactions and network participation rewards. Groups that cannot be fully identified will still have some basic processing applied such as fee combining and not displaying redundant app calls.
How to use:
This guide is designed with non-technical windows PC users in mind. The first steps include downloading required software; Python (version 3.12 or higher), Visual Studio Code (often referred to as VSCode), and Detechdefi from GitHub. Links provided below.
Download Python: Download VSCode: Download Detechdefi:
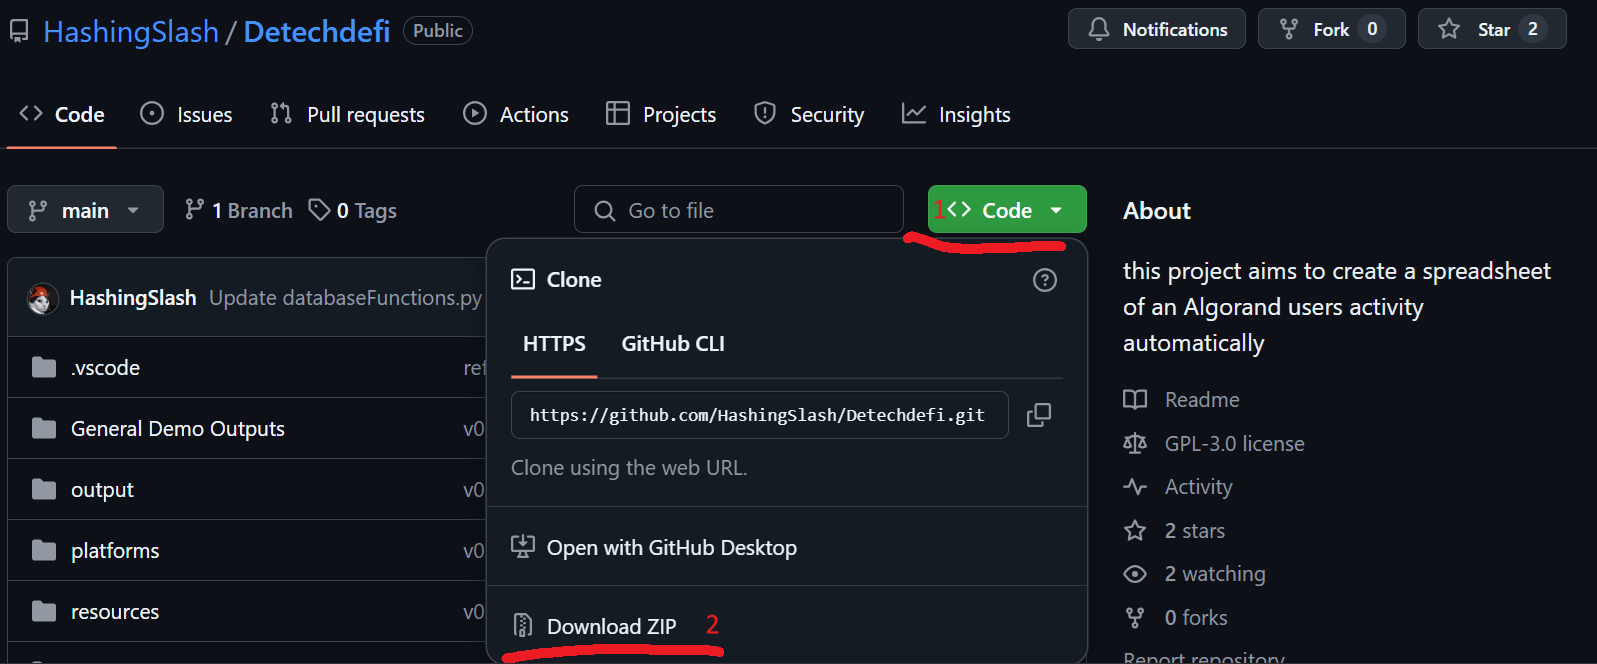
To download Detechdefi from GitHub click on the green 'Code' button and then 'Download Zip' from the pop up box.
The image below has some numbers added for reference.
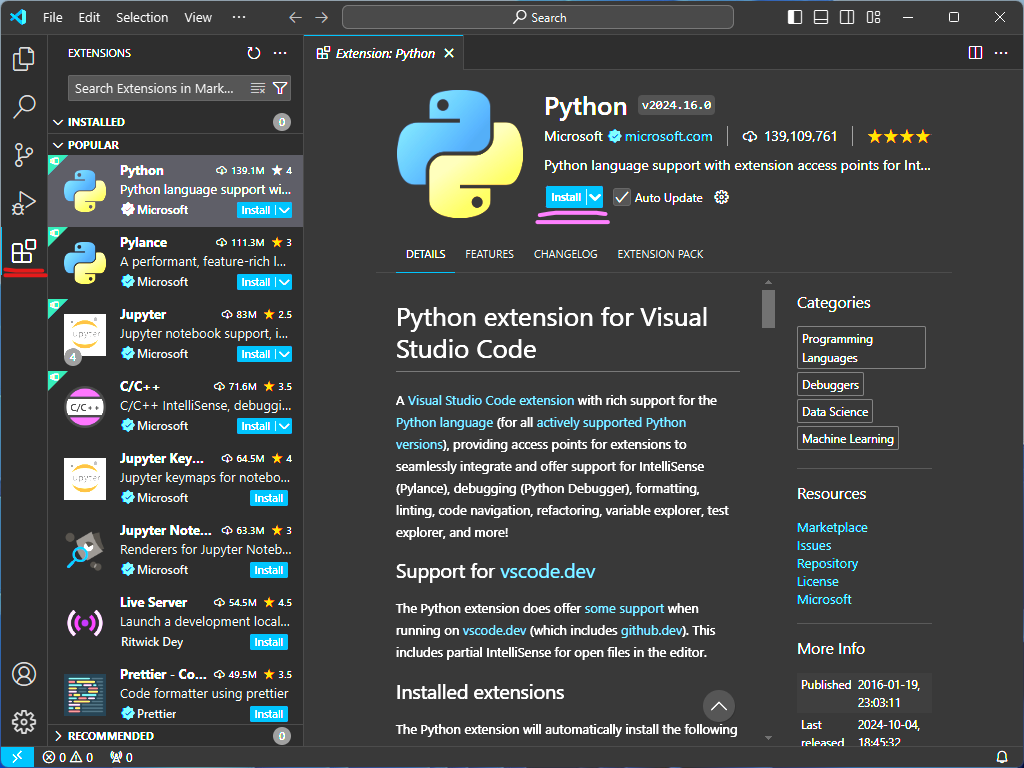
Install Python and VSCode. Right click the Detechdefi.zip and select Extract all. This will create a Detechdefi-main folder which will contain another folder named Detechdefi-main. This second folder is the main project folder, and is the one I am referring to as the nested Detechdefi-main folder. Open the VSCode program and navigate to the extension tab on the side bar (underlined in red in the screenshot below). Once there install the python extension for VSCode.
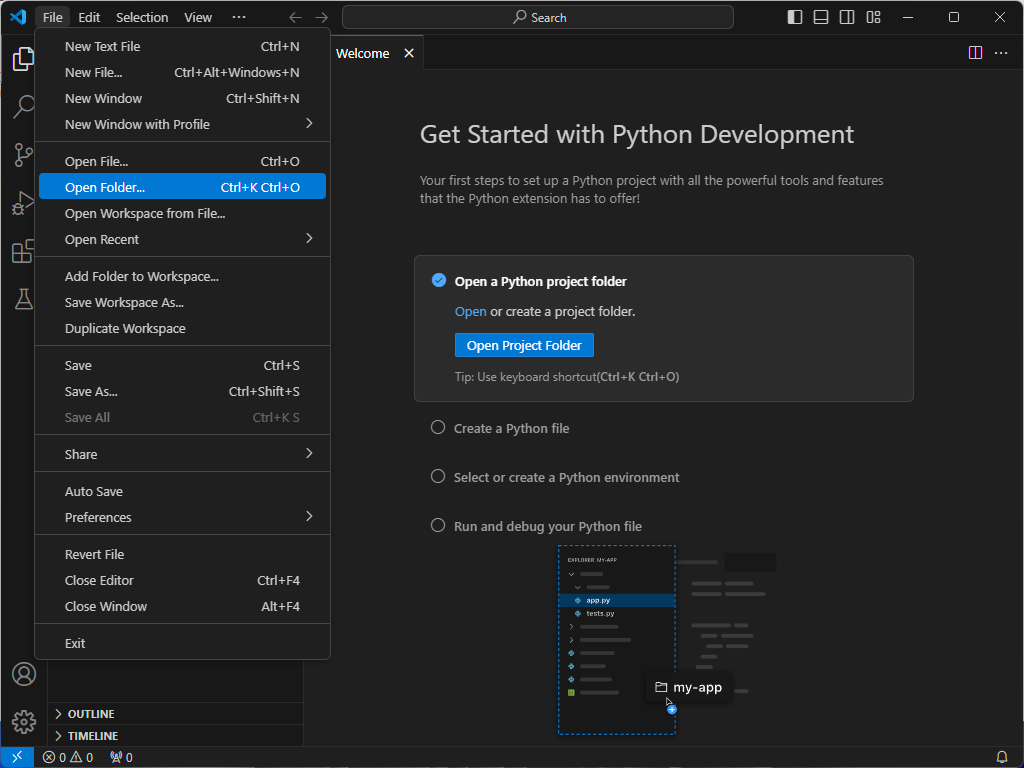
Now your Visual Studio Code installation should be compatible with .py files sch as Detechdefi. In VSCode, open the nested Detechdefi-main folder.
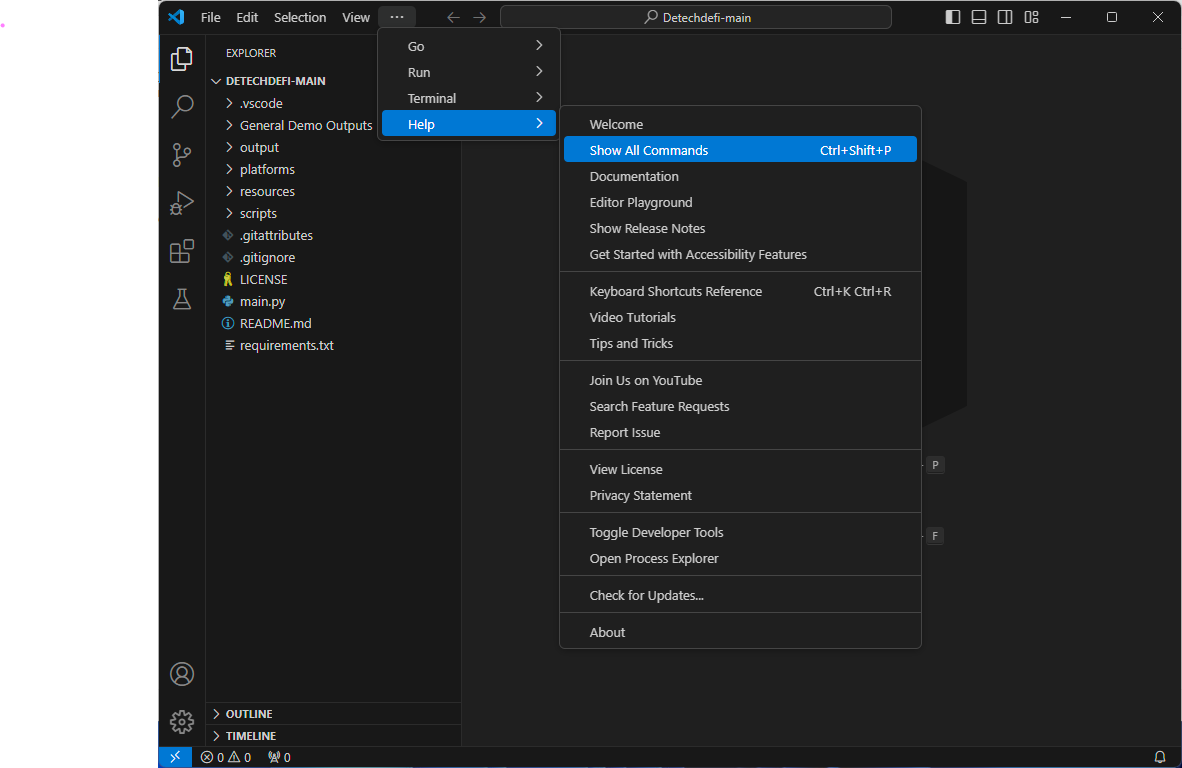
In VSCode, from below title bar select Help > Show all commands.
In the box that pops up on screen, type in 'env', and select Python: Create Environment > Venv > The version of python previously installed > check the requirements.txt check box > OK. This will set up a working environment for the project and download other required python programs. Select the main.py file from the file browser on the left side of the screen and select Run > Start Debugging from below the title bar. This will begin the Detechdefi program in a Terminal window on the bottom portion on the VSCode screen. Ensure the Terminal window is selected and enter the target wallets address or NFD. Enter y or n for yes or no to collect trending asset data from Vestige. Now the program should need to time to collect and process transaction data.
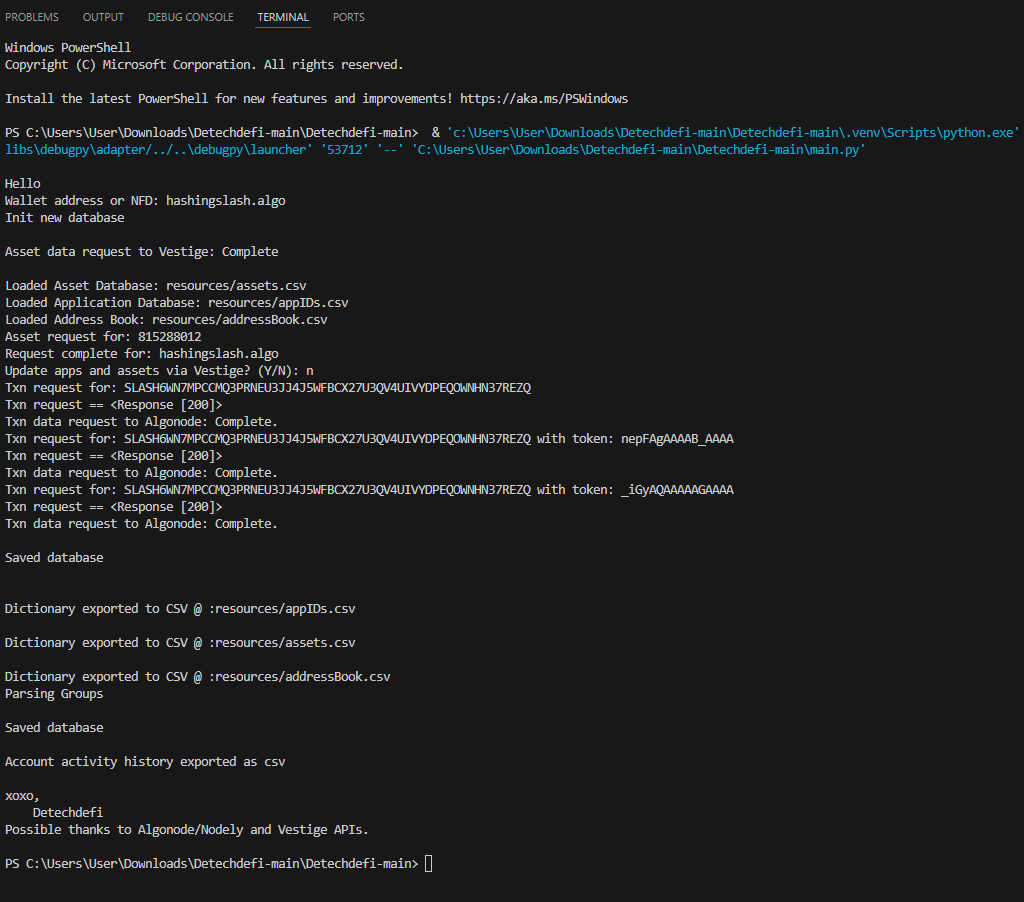
nce the end of terminal screen looks like the pictured example you can close VSCode. Transaction history .csv can be found in the output subfolder within the nested Detechdefi-main folder.